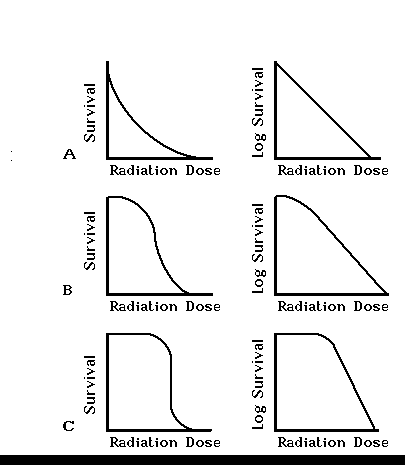
Figure 1: Idealized Survival Curves
Return to the Chapter